

With Autumn approaching Robbie and I have enter full nesting mode. Our apartment has been filled with the smell of various pots of broth cooking away for hours, and Robbie has recovered the batch of pumpkin pie spices that had been lost to the back of the spice cabinet. Much to his chagrin, I still think its too early to pull on our cabled sweaters and play the Bright Eyes Christmas album (as I write this the temperature outside is 80 degrees).
One of the projects we've done to prepare for the colder months was treating all of our wooden cooking utensils and cutting boards with beeswax spoon butter. Sealing wooden utensils with spoon butter helps prevent future damage and fills in cracks where damage has already occurred. Wooden cutting boards and utensils are amazing investments, or in my case my favorite gifts, and this recipe will help preserve them season after season.
For this recipe you will need a small saucepan, a glass jar (used to make and store your spoon butter), beeswax pellets and coconut oil. The amount of beeswax and coconut oil you will need depends on the size of the jar you use. The ratio you should follow is one part beeswax to 4 parts coconut oil, as a large amount of oil is needed to make the beeswax spreadable.
1. Add enough water to your saucepan so that when the jar is added, the water level is halfway up the height of the jar.
2. Add the jar filled with the coconut oil and beeswax to the water and warm up over medium heat.
3. Once the beeswax has melted, stir the mixture and remove from the heat, taking care not to burn yourself on the jar.
4. Allow the contents of the jar to cool until it is room temperature.
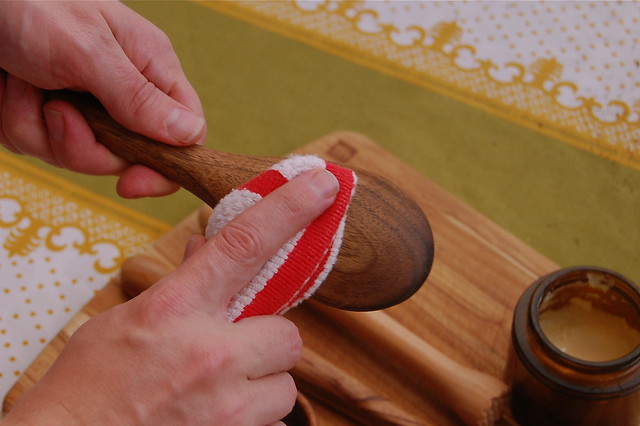
At this point you can use your spoon butter by taking a small amount and rubbing it on your utensils with a napkin or paper towel until it has a soft glossy finish. I highly recommend using this at the beginning of each season!
XO
Pat
